Habits to develop in the field for better photos
Introduction
You know that feeling when you get back home after a photo trip, look through your images and realize that they don’t quite match what you had in mind? Or maybe you notice you made some mistakes or feel like you missed out on something?
Then this blog is for you.
No matter your experience level, developing some healthy habits in the field is crucial. The moment you are out is the time when you need to maximize your output, make the right decisions and get the best images possible out of the conditions in front of you.
Over the years I have gone through many stages of frustration and disappointment which helped me analyze myself and develop some habits that help me so much in the field today.
#1 Arrive early to the location
This is maybe the best way to set yourself up for success as it allows you to get acquainted with the location and gives you time to prepare.
Sometimes it is not possible to arrive too early but when it is, make sure you give yourself that time. It really makes a big difference to avoiding that feeling of panic and being overwhelmed when good conditions happen.

Madeira sunrise at Sao Lourenco
This image is one of my favorites from Madeira because of the composition. I was only able to capture this at the right moment because I had some time before sunrise to compose this photo, then waited for the perfect conditions.
#2 Observe and explore before taking out your camera
If you’ve implemented tip #1, then you should have time for this. I tend to find better compositions from the get-go when I take the time to look around, walk a bit and try to find the best angles rather than just jump at the first thing I see.
The moment you take out your camera and especially your tripod, your equipment gets in the way. When you get some incredible conditions, you want to make sure you’ve evaluated many options and decided to stick to (one of) the best ones.
Walk around and observe the location from different angles, then start making some decisions about where you want to place yourself to begin with.
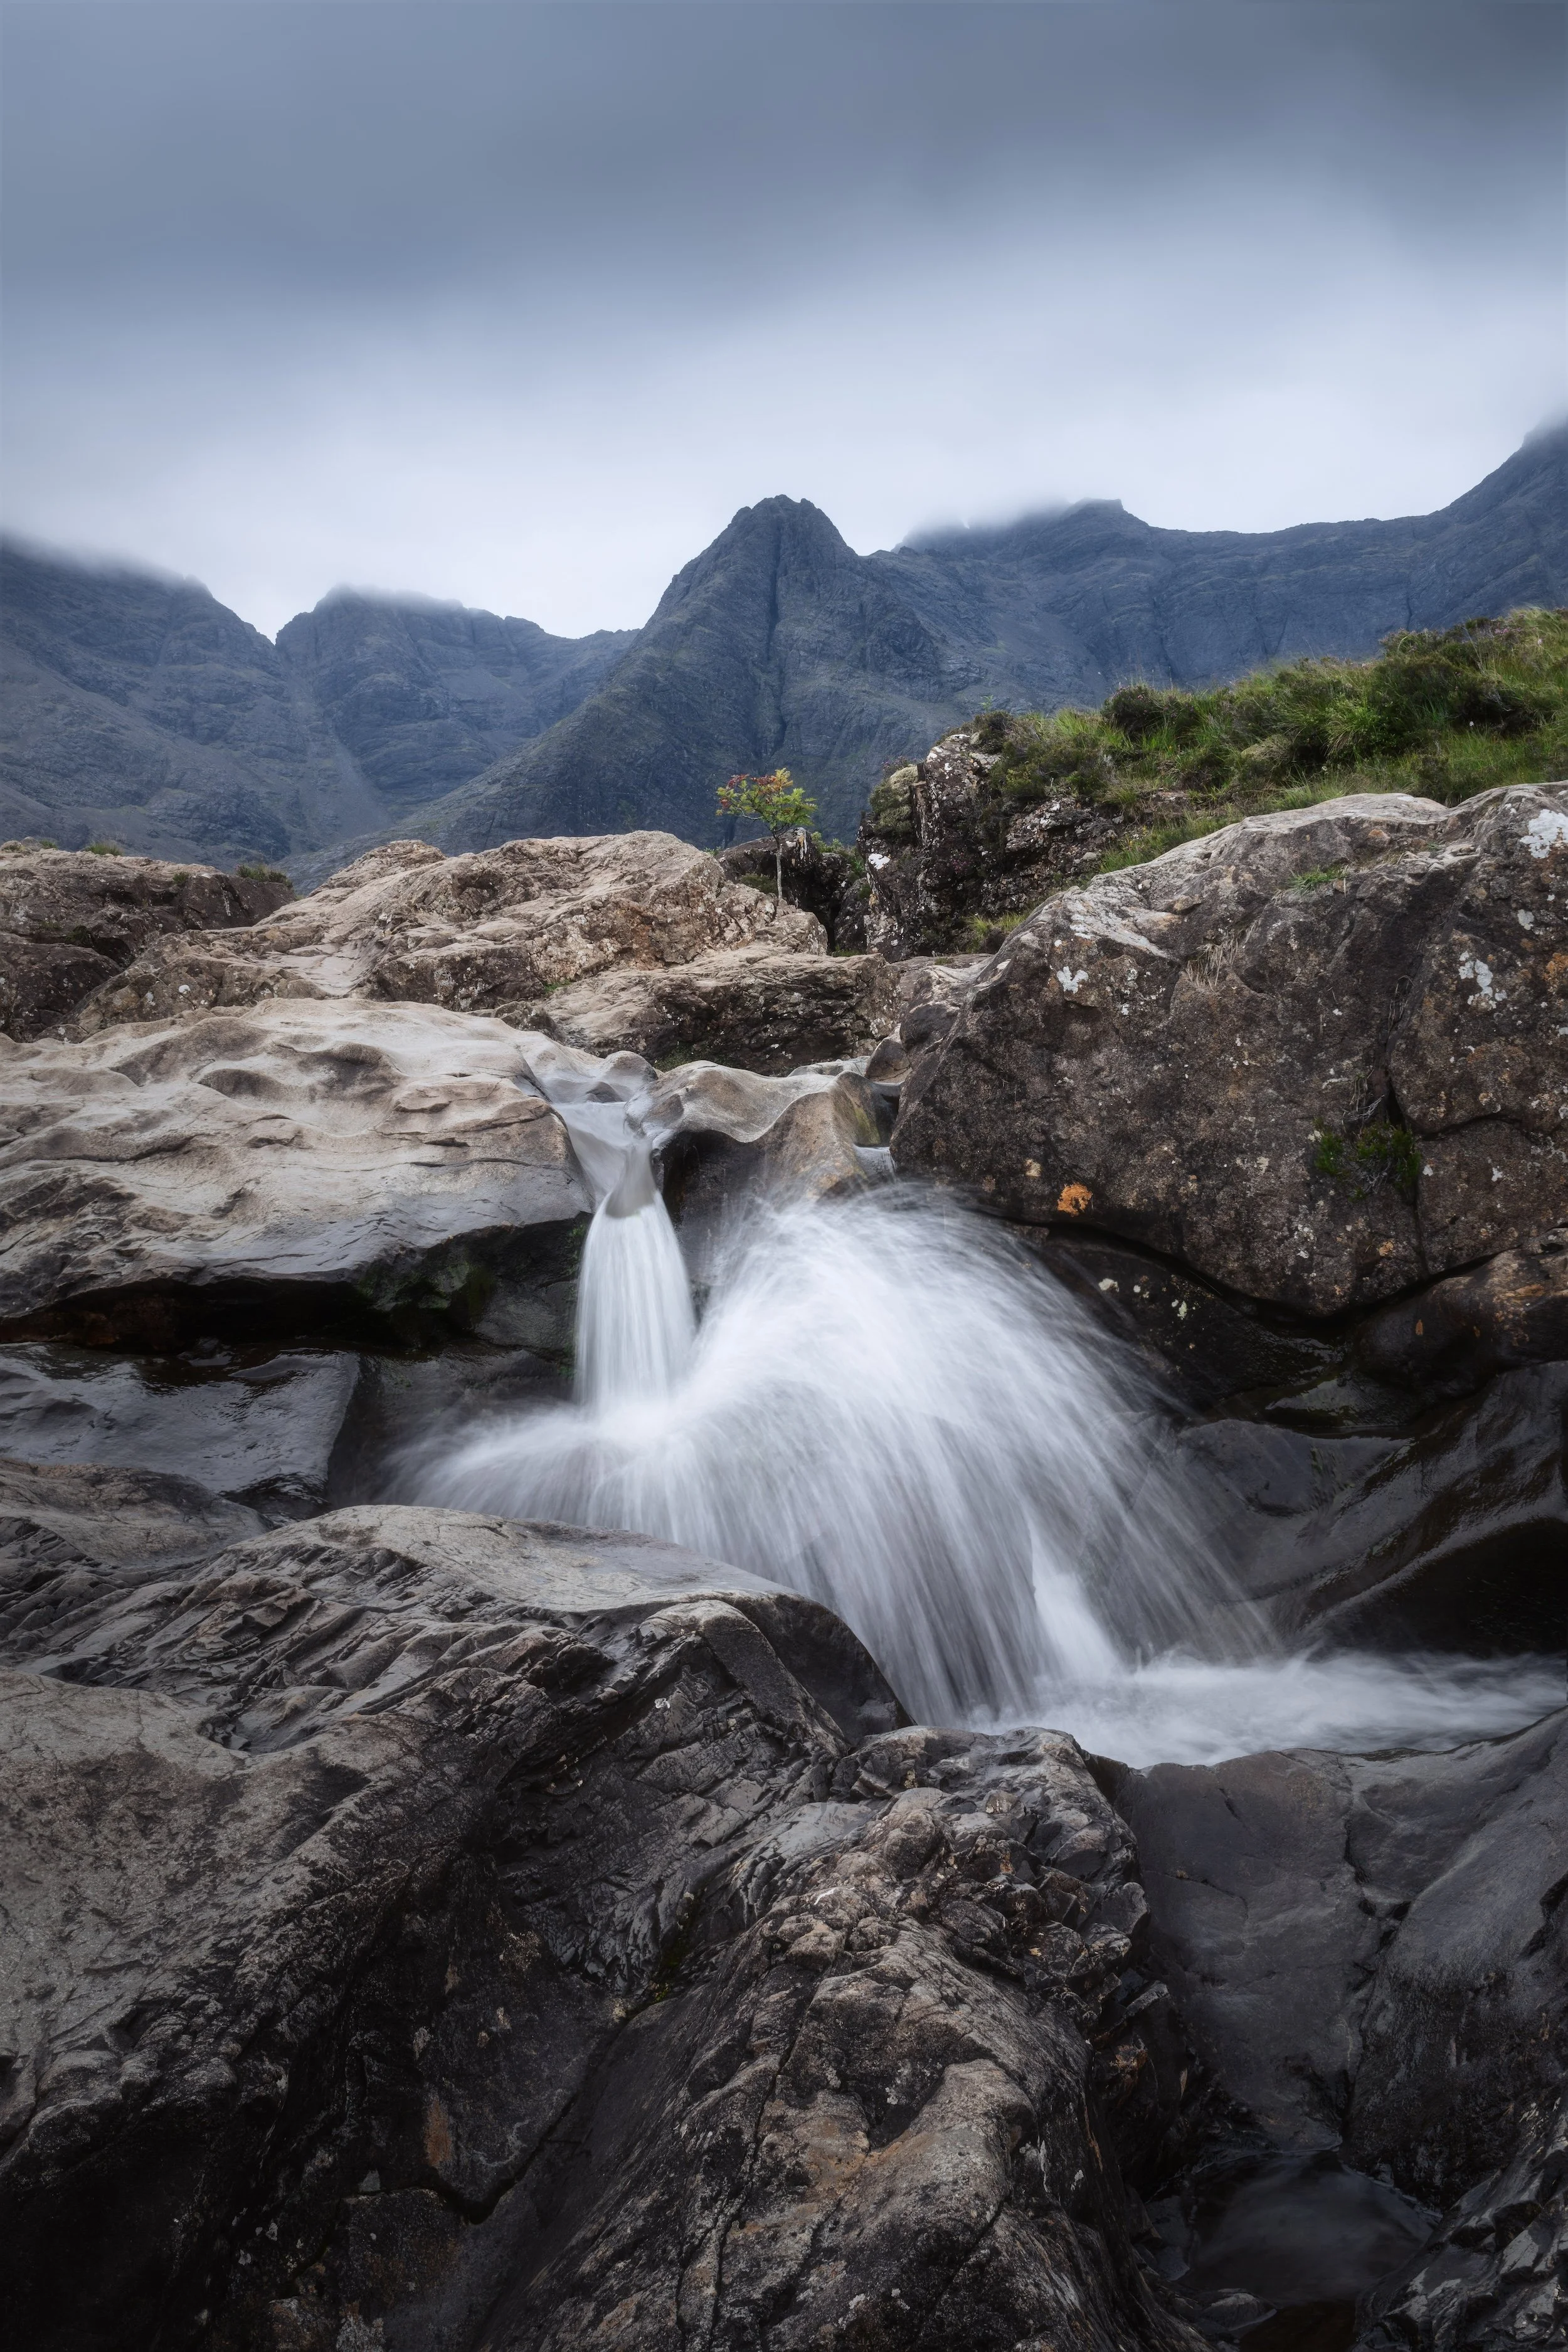
Fairy pools flow
I spent quite a lot of time walking around and scrambling on rocks before I found this composition. I used my phone to find the perfect angle, then took out my camera and tripod to take the final shot.
#3 Map the location and make a plan
This tip can be a bit tricky but it becomes easier with experience. What I mean is, try to evaluate the location as a whole and make a plan of “attack” so to speak.
That plan can involve anything from where you want to be at different times, to what to photograph in different lighting conditions or what gear you need to use when.
Here’s an example.
When I went to the white chalk cliffs in south Denmark, I knew there’d be good chances of low clouds so my first priority was to get some aerial images.
Arriving at the location, light was already fantastic so I quickly decided that I would put the drone up in the air first thing.
So my plan looked as such:
Fly one battery drone, get some shots and footage while the light is still golden
Bring the drone down and start exploring on foot
Go to the most dramatic cliffs (which I saw from the drone) to catch them from the ground covered in fog
Return to the drone on the second battery to shoot some footage with me as the subject as well
Use the last drone battery for shooting different formats and making some panos
Returning to my camera and start exploring some smaller scenes and minimalistic reflections
Of course you need to prepare that things might not work out according to your plan, in which case you will need to adapt quickly. However, if you are able to stick to it, you can maximize your output and not feel like you missed out.
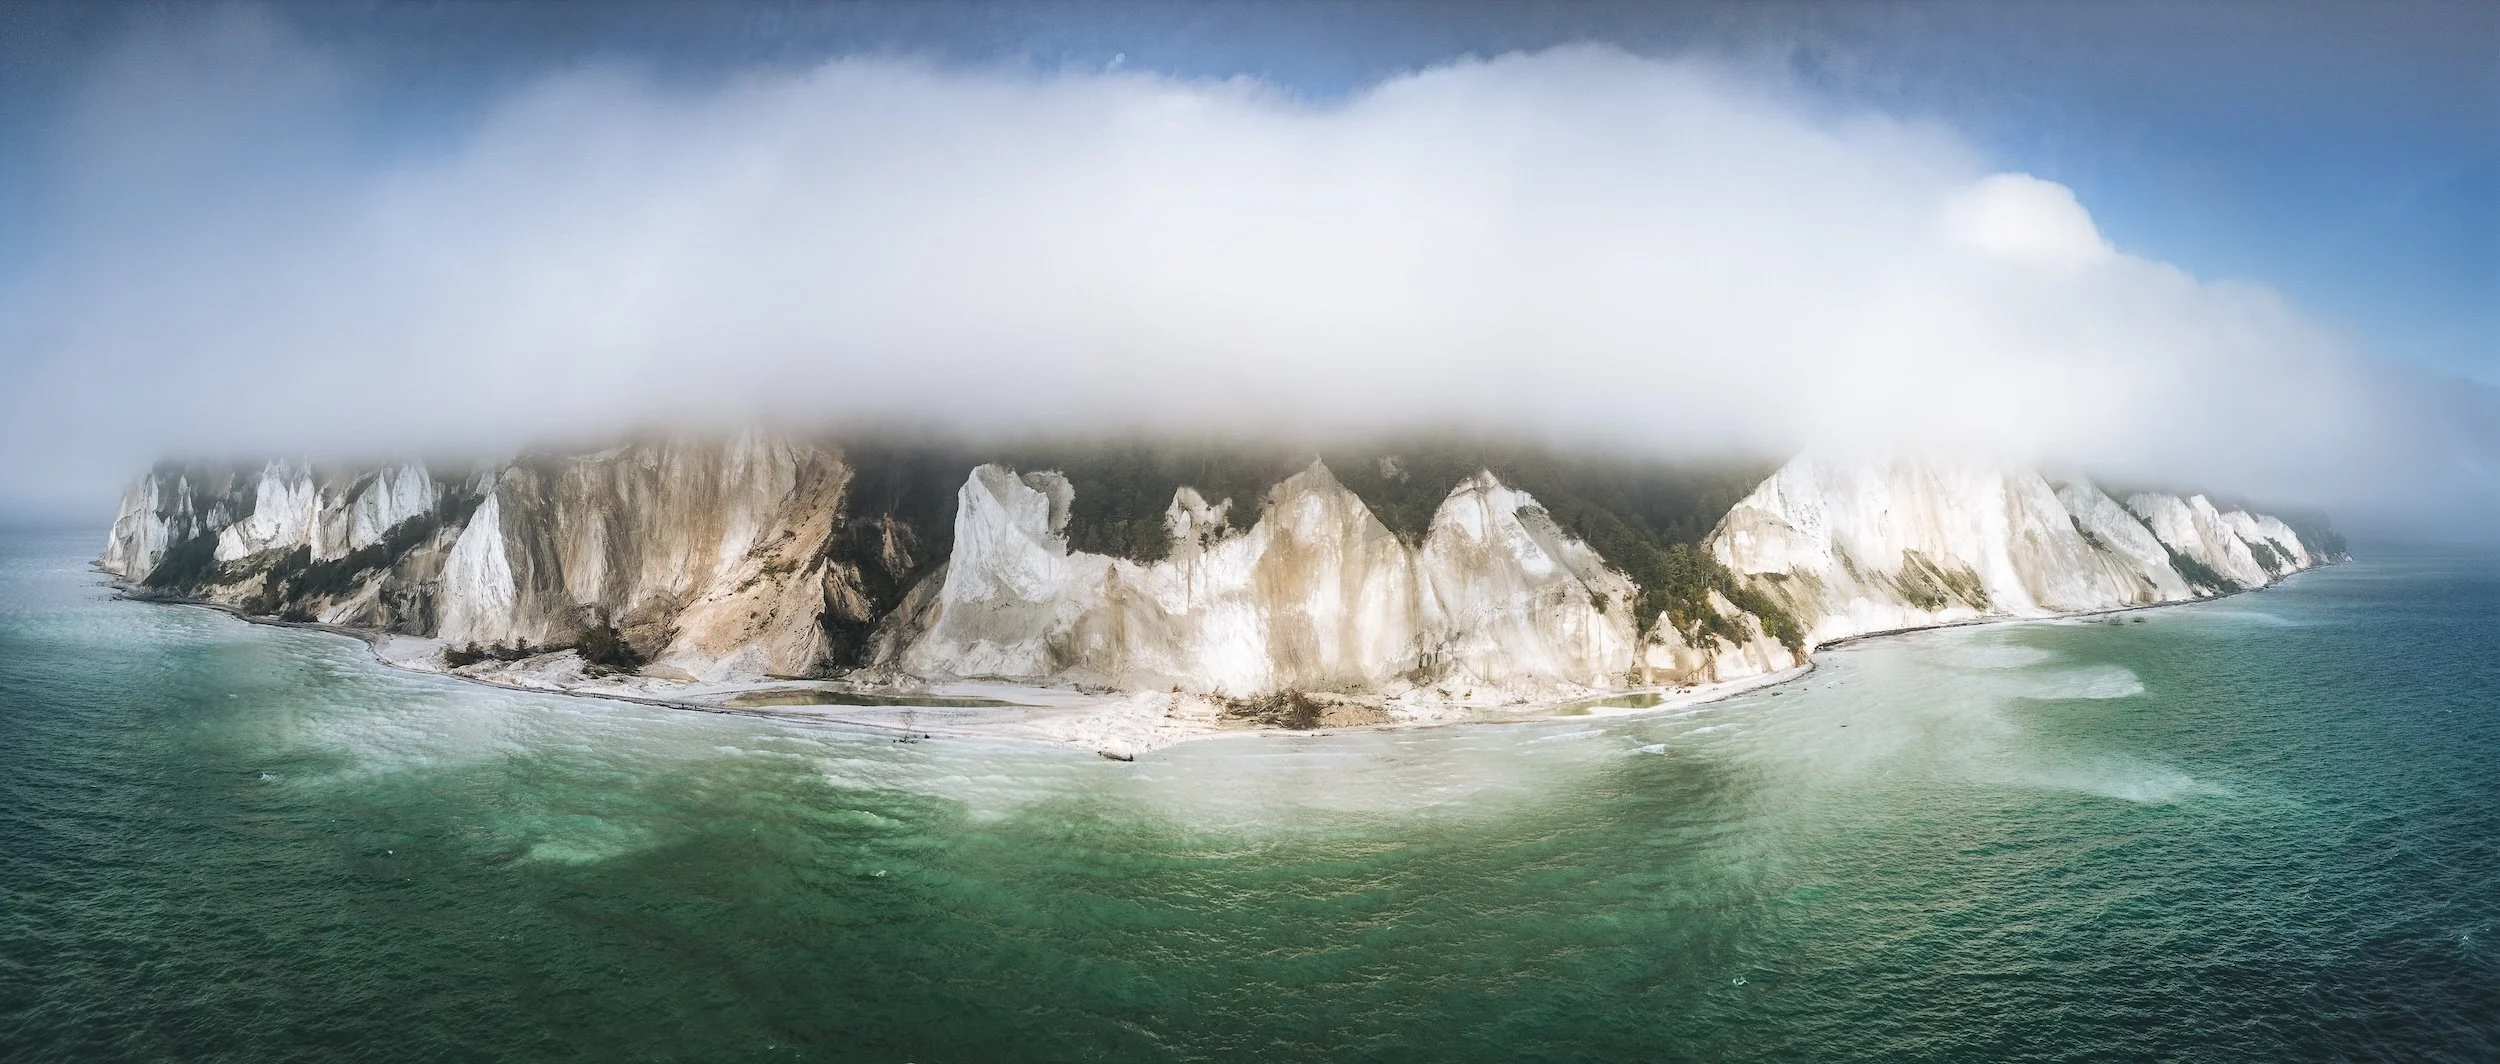

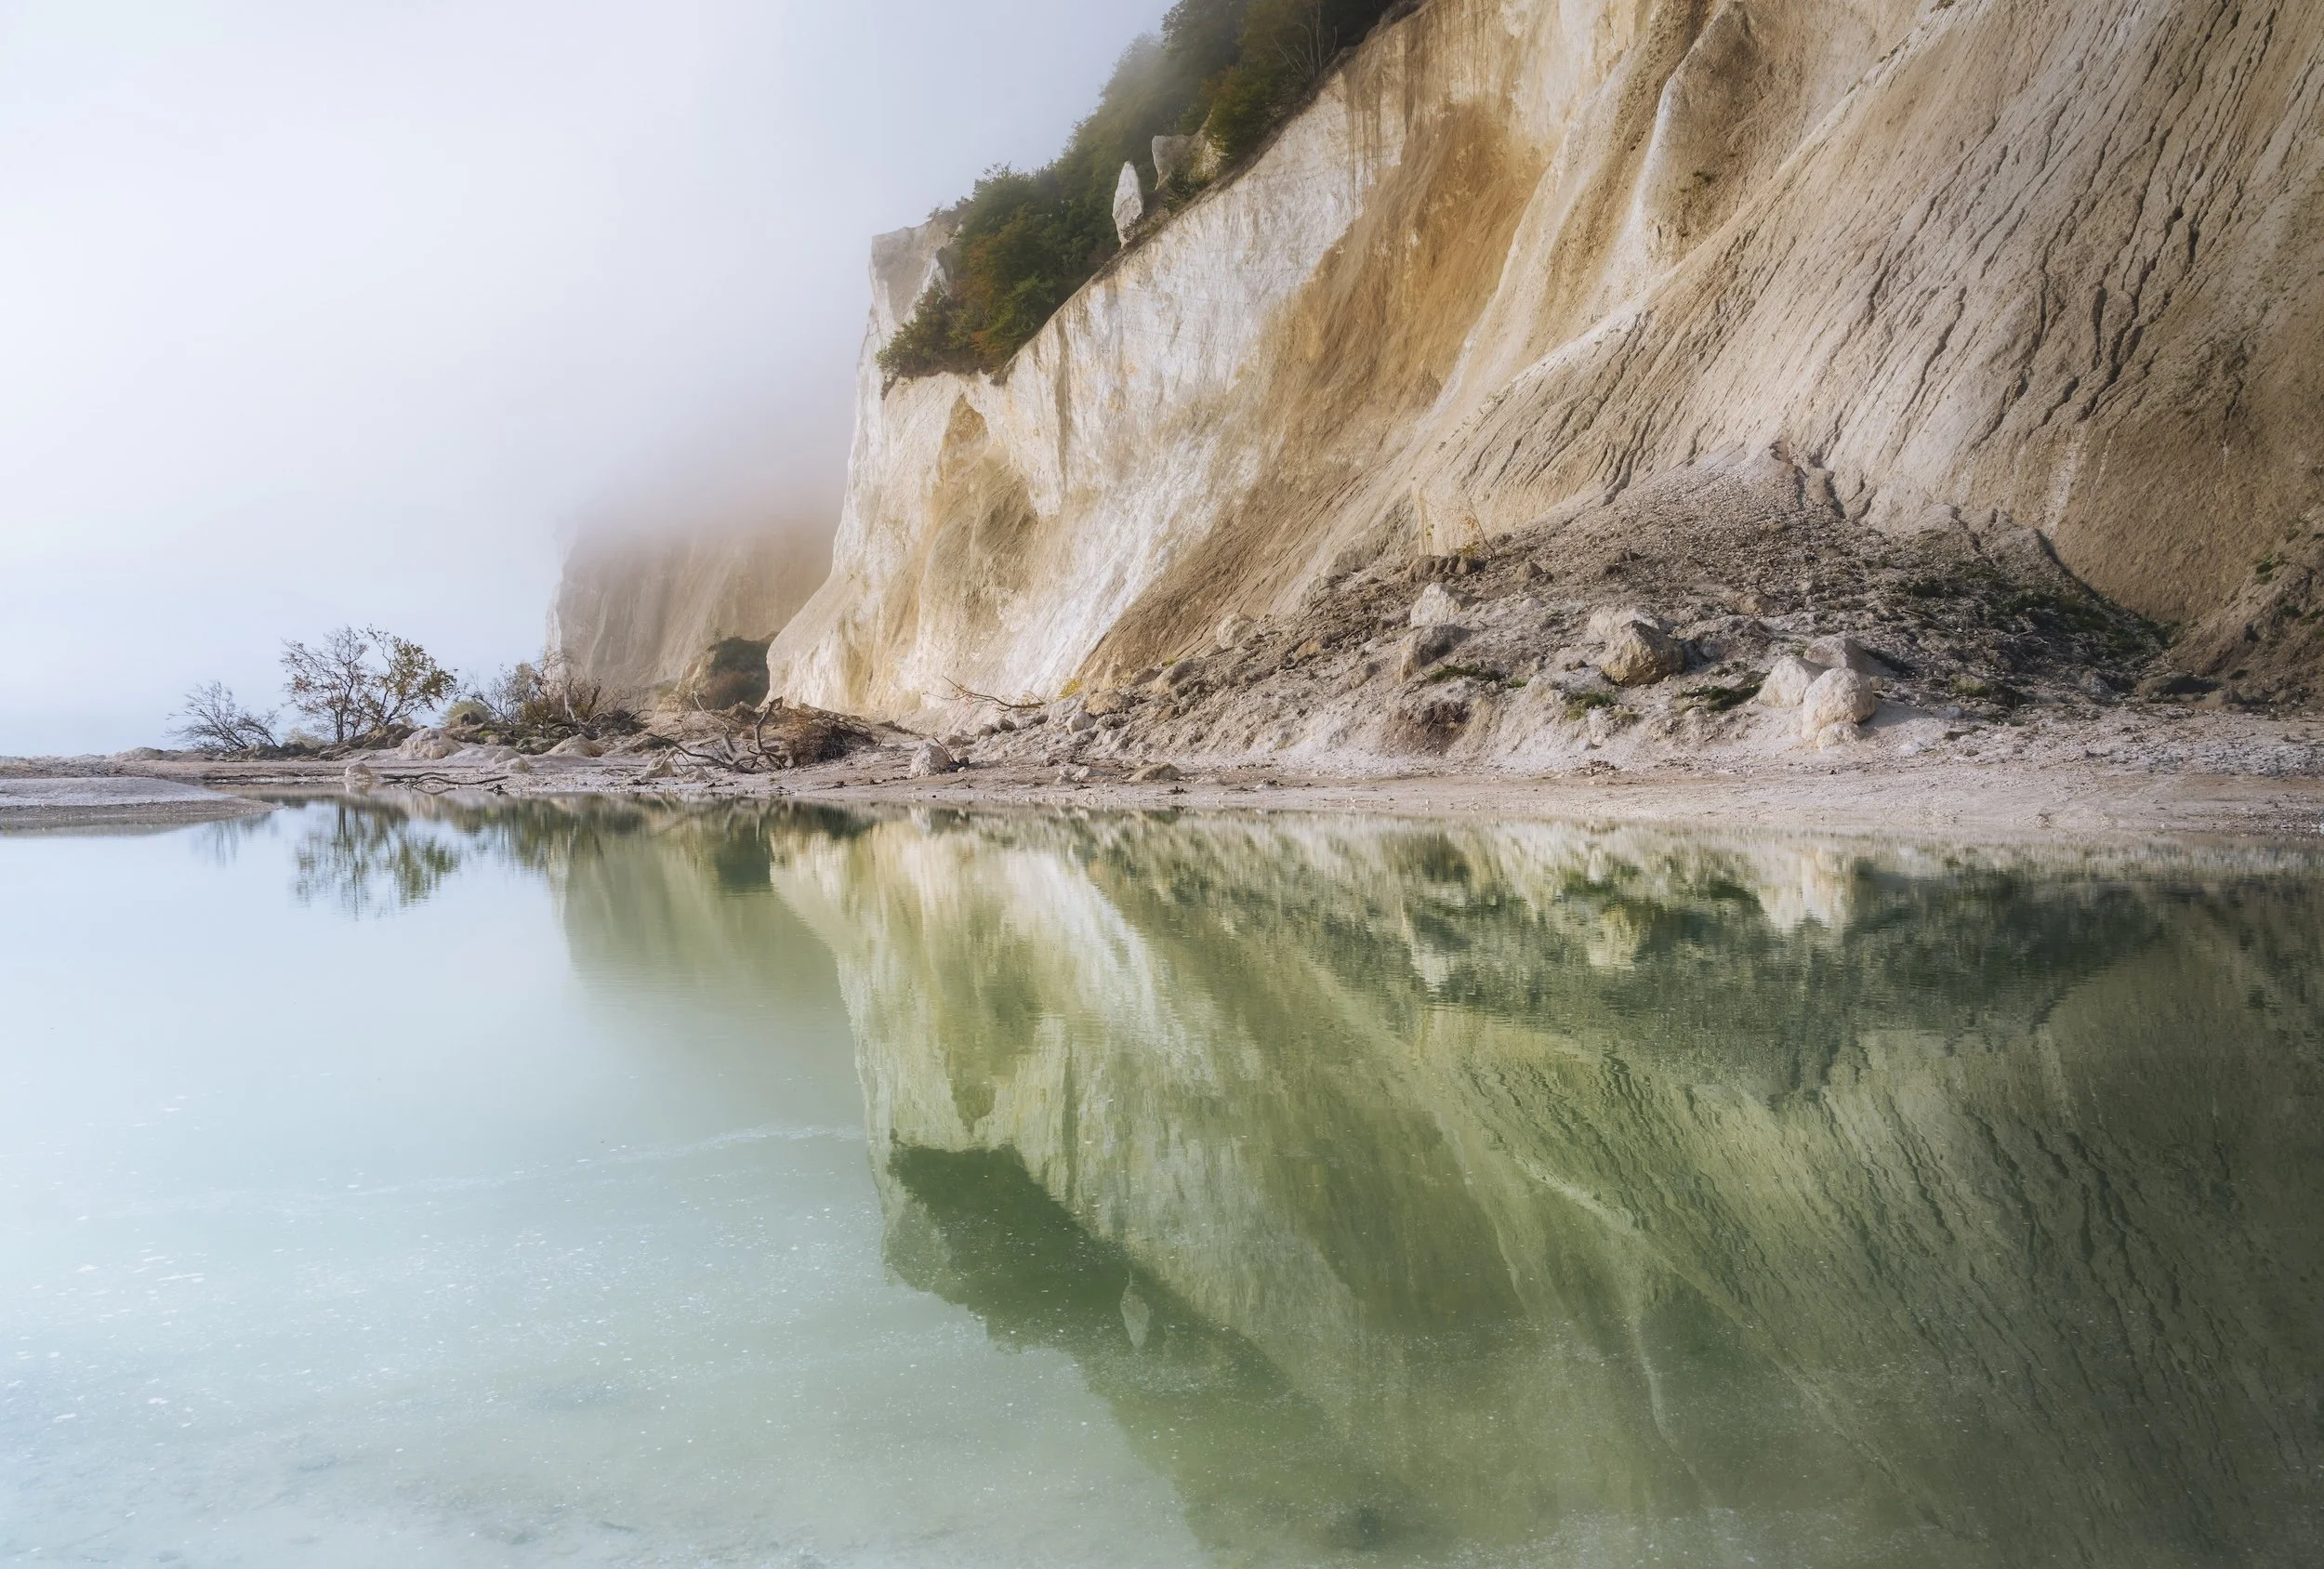

Foggy Møns Klint
These images are all captured at the white chalk cliffs on camera and drone, according to the plan above at different times.
#3.1 Anticipate weather progression
A sub tip about the weather because I think it’s important. Becoming a good weather reader is a massive advantage in this business. Keep an eye out on how conditions are shifting and what that means to your shoot.
Luckily, weather is predictable to a certain extent and it is a lot easier to anticipate its next move when you’re already in it.
A few things to keep an eye on:
Know the movement of the sun on the sky
Keep an eye on cloud movement
Look around 360 degrees - light can change drastically
Keep an eye on where light and shadow form as the sun moves
Watch tide and wave development
#4 Multitasking? Let the gear work for you
This is mostly for those of us wanting to do multiple things at once, such as shooting stills, while doing timelapses, while capturing video, while flying the drone. Obviously, it is not possible to do all of this at once.
But..you can get your gear ready so it can work for you and help you do more.
One of the things I like doing is to use the intervalometer on my camera and set it up to shoot automatically. This can be of tremendous help when conditions are peaking and you want to get the shot but also catch some video footage on another device or fly your drone. It’s such a powerful tool!
If you’re doing timelapses, make sure to set up the camera and tripod from the get-go, check the settings and keep it pending until you’re ready.
An important thing is to make sure you check that the camera settings are still adequate once conditions change massively (for example the sun rises and becomes really strong, you might end up overexposing). I usually keep some settings on auto such as the ISO, so the camera adapts it to the lighting conditions on the go.
#5 Spend time perfecting a composition..but don’t get hung up
There’s no right or wrong to this.
But I find that the perfect balance is to evaluate a potentially good composition rather quickly and decide whether it works or not - not force it.
There are many elements to a composition including the subject, lighting, distractions/messiness, balance, etc so you need to get better at being a quick judge of all these things.
There are also static vs. dynamic elements to keep in mind. Pay attention to the statics and anticipate the dynamics (such as light, moving elements - clouds, birds, water, etc).
If you can quickly see that you’re not happy with your composition, it’s best to move on and try to find something else. Go back to observing and even put the camera away if it hinders you. Sometimes using your phone can be a really powerful tool.
#6 Come off autopilot: Check your camera settings
We all get excited when the perfect conditions come to pass. These moments are also dangerous because they can cause us to lose our heads and make mistakes.
Make the habit of checking that your settings are right for the conditions in front of you - no matter what. You might have been out in very different conditions last time you used the camera. Or… conditions might have changed from 30 minutes ago.
Not actively thinking about your settings at all times can result in unusable images.
Things to not forget:
Make sure your stabilization is on/off for handheld vs tripod
Focus stack and exposure bracket when needed
Check the histogram and expose to the right
Watch the shutter speed - a too slow shutter speed is a common reason for blurry shots. Up your ISO if you need to because there is software that handles noise reduction today. A blurry image isn’t salvageable.

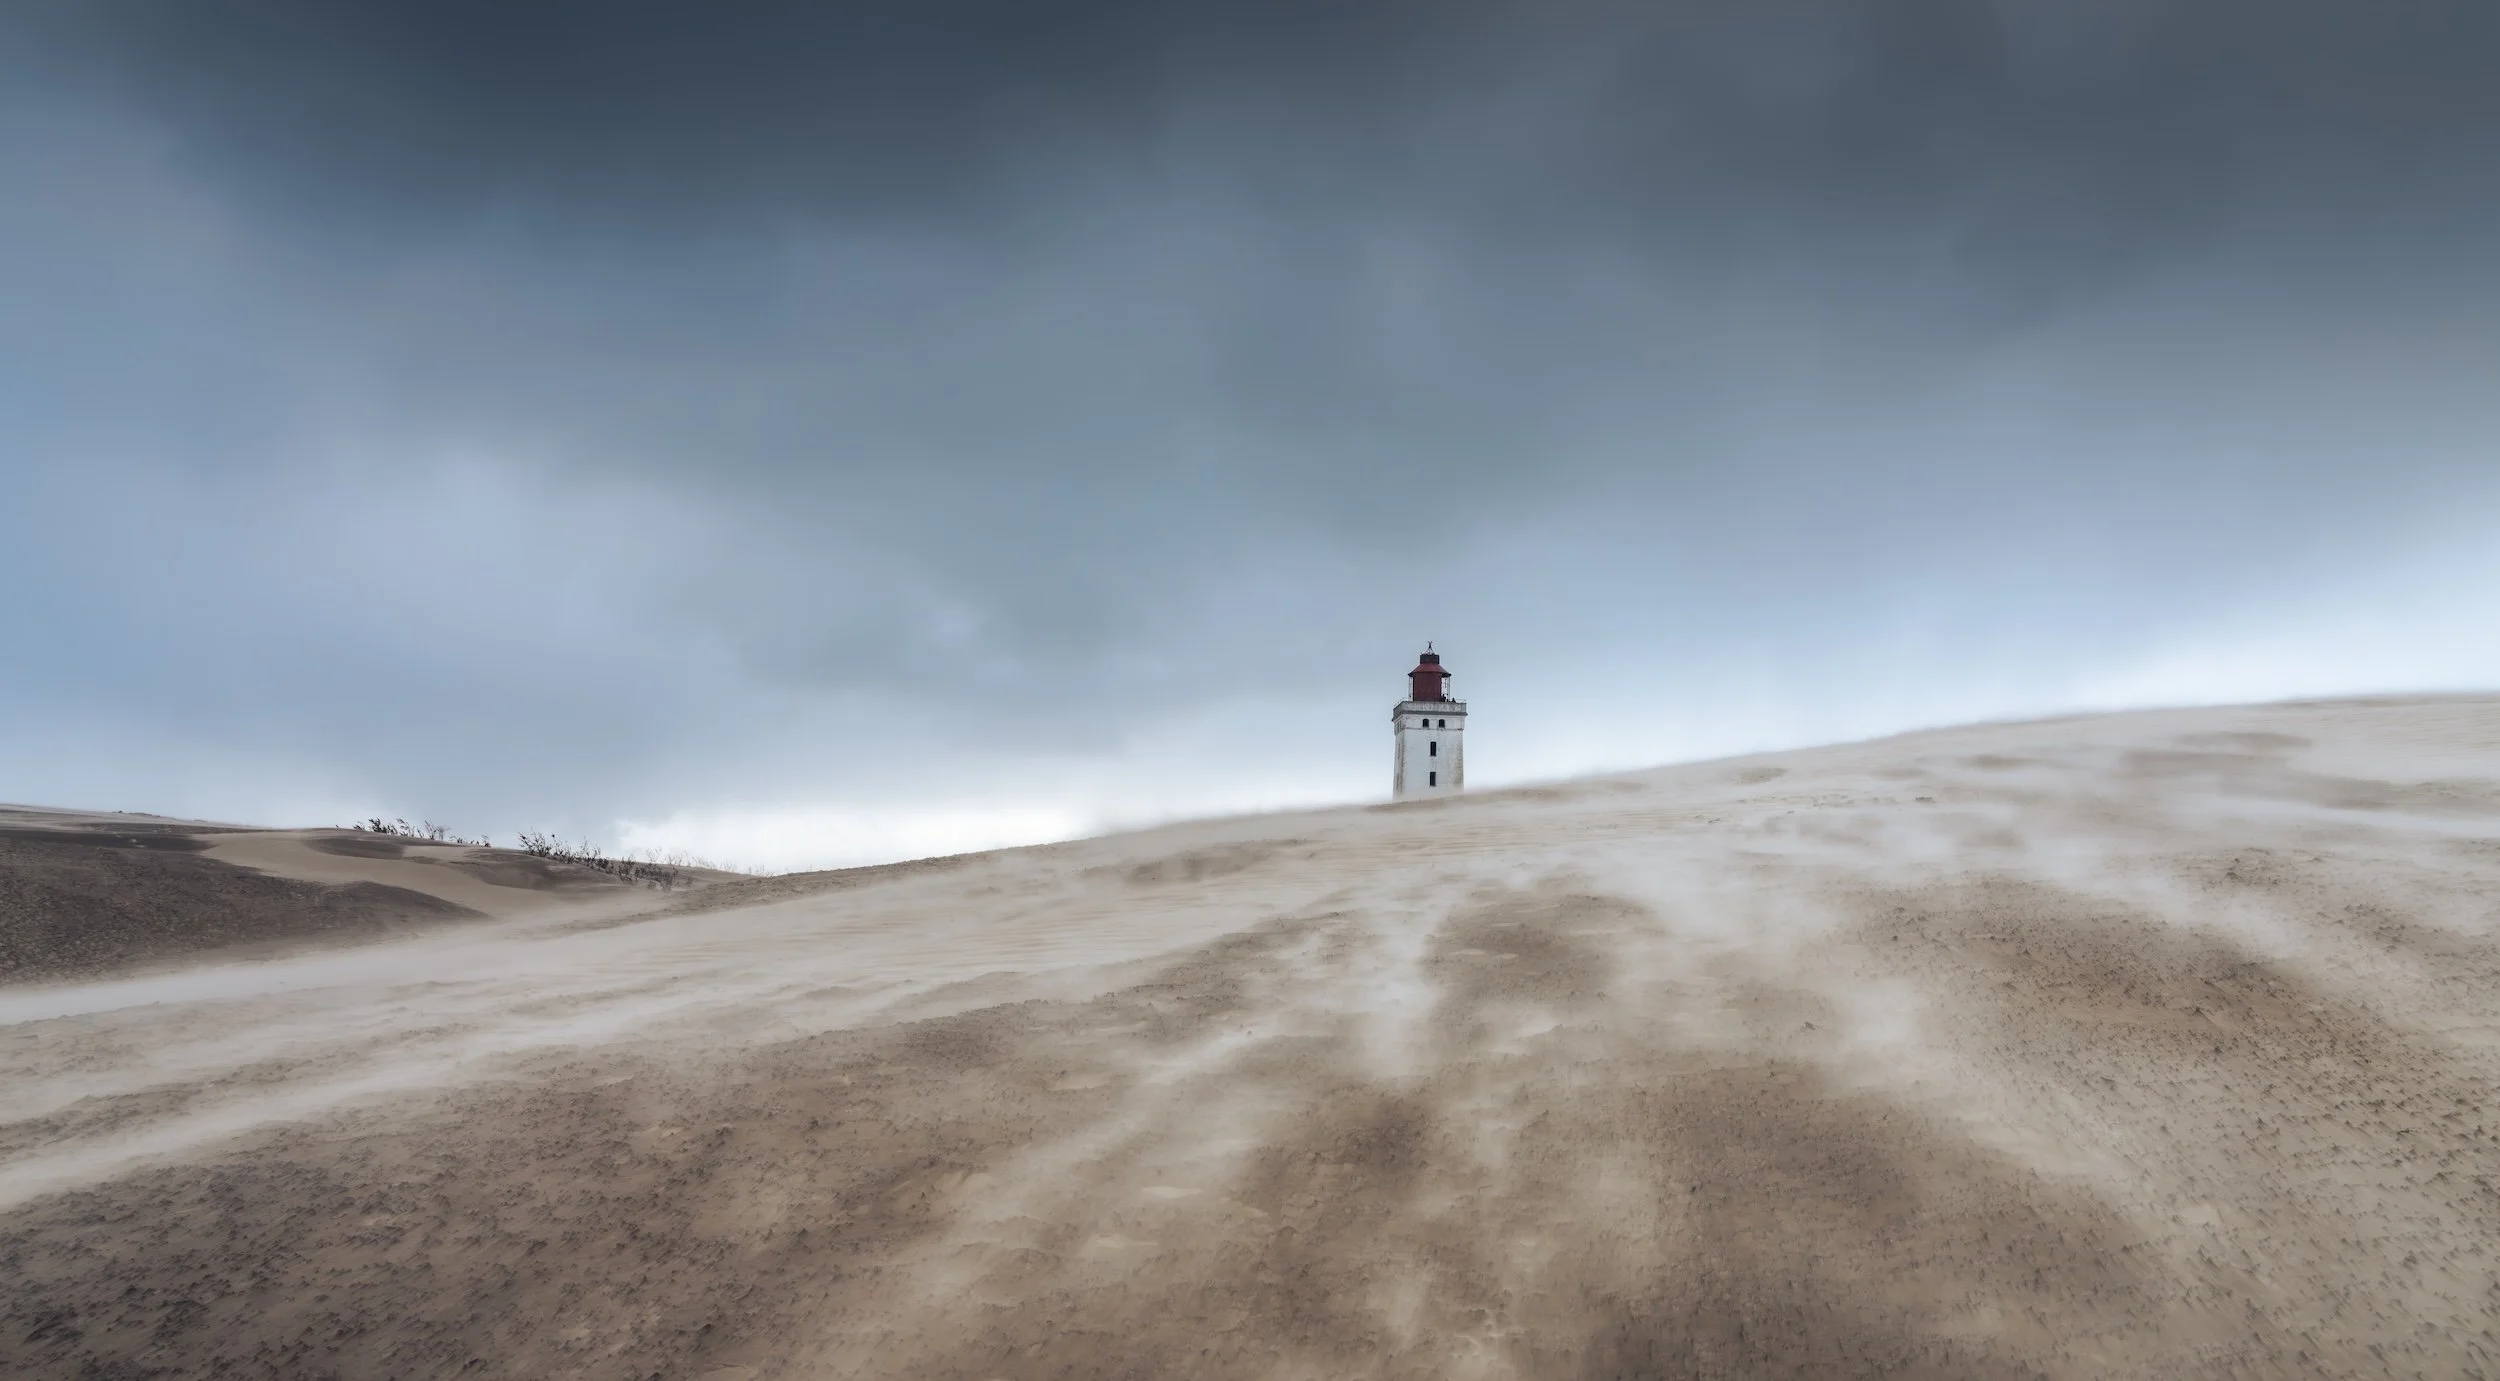
Sand storm at Rudbjerg Knude
I had to up my shutter speed and ISO quite a bit to be able to catch sharp images here due to the crazy winds. The camera shake was massive in spite of all my efforts to keep it steady. I ended up going as fast as 1/160s to get sharp images in those conditions, despite there being plenty of light.
#7 Quality check your images during your shoot
Take a moment to check your images on the back of your camera. Make sure you got what you needed and that your images and subject are sharp, that you got the composition right, etc.
Sometimes even with all the theoretical knowledge, you can find that some images need adjustments in order to achieve your desired result. And there’s no other moment to fix those things than in the field.
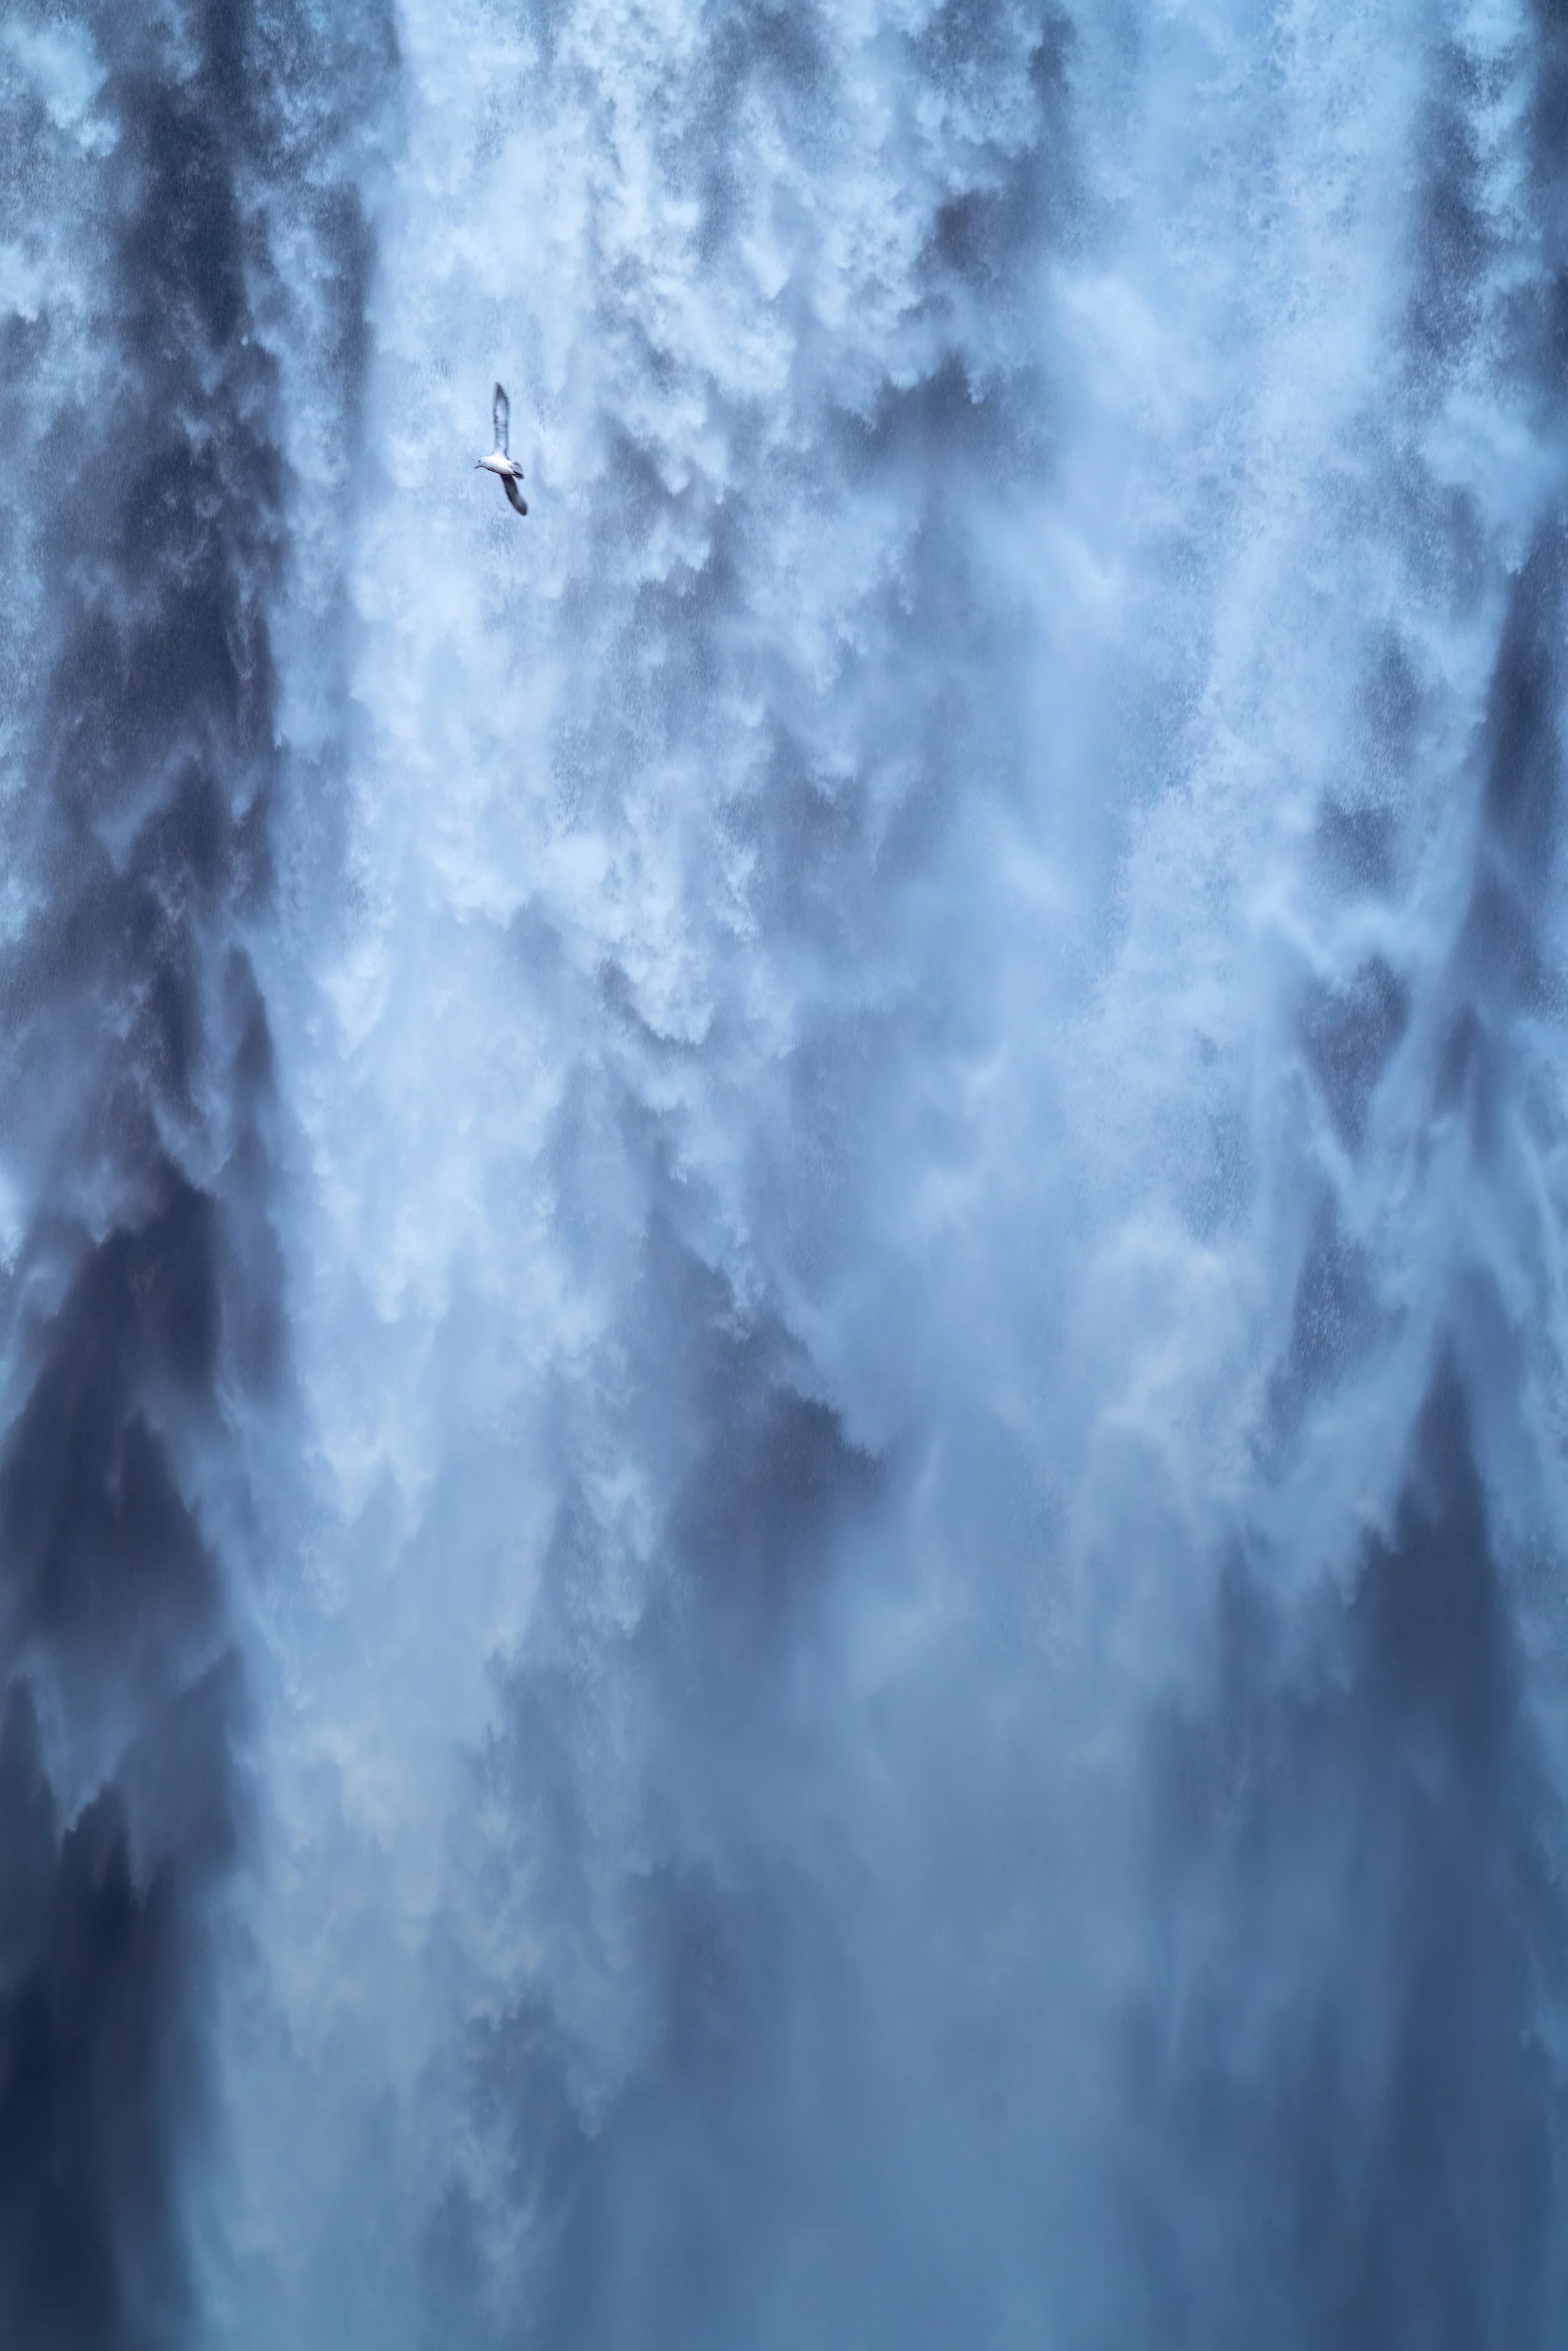
Skogafoss gulls
I had 3 attempts at getting the birds in focus here and the right placement. I was using my 100-400mm lens and zoomed in a lot to get the compression which made it so hard to focus on the birds flying in front of the waterfall. Shutter speed went really fast, ISO high and still these images aren’t 100% sharp.
#8 Take breaks
Breaks are so important for giving yourself time to think, observe and reset. It’s an important part of the process and often taking a breather gives you the chance to make incremental improvements.
One thing I try to do is be intentional about when I take a break. I want to be sure I don’t miss out on anything crucial, so I wait for a good moment when nothing important happens. It’s usually when I have already taken every shot I can think of and I notice that conditions remain stable or become less interesting.
#9 Be patient and don’t leave too soon
It’s happened to me more times than I care to admit… I waited around but decided to leave at some point which was too soon. Then conditions got insane as I was driving away.
That feeling is really frustrating so that is why being patient together with becoming good at anticipating conditions are essential. Many times your patience is rewarded but it can also be in vain. When in doubt, it’s best to stay rather than leave.
So don’t give up too soon before you’re as certain as you can be that you won’t get anything more out of your shoot.
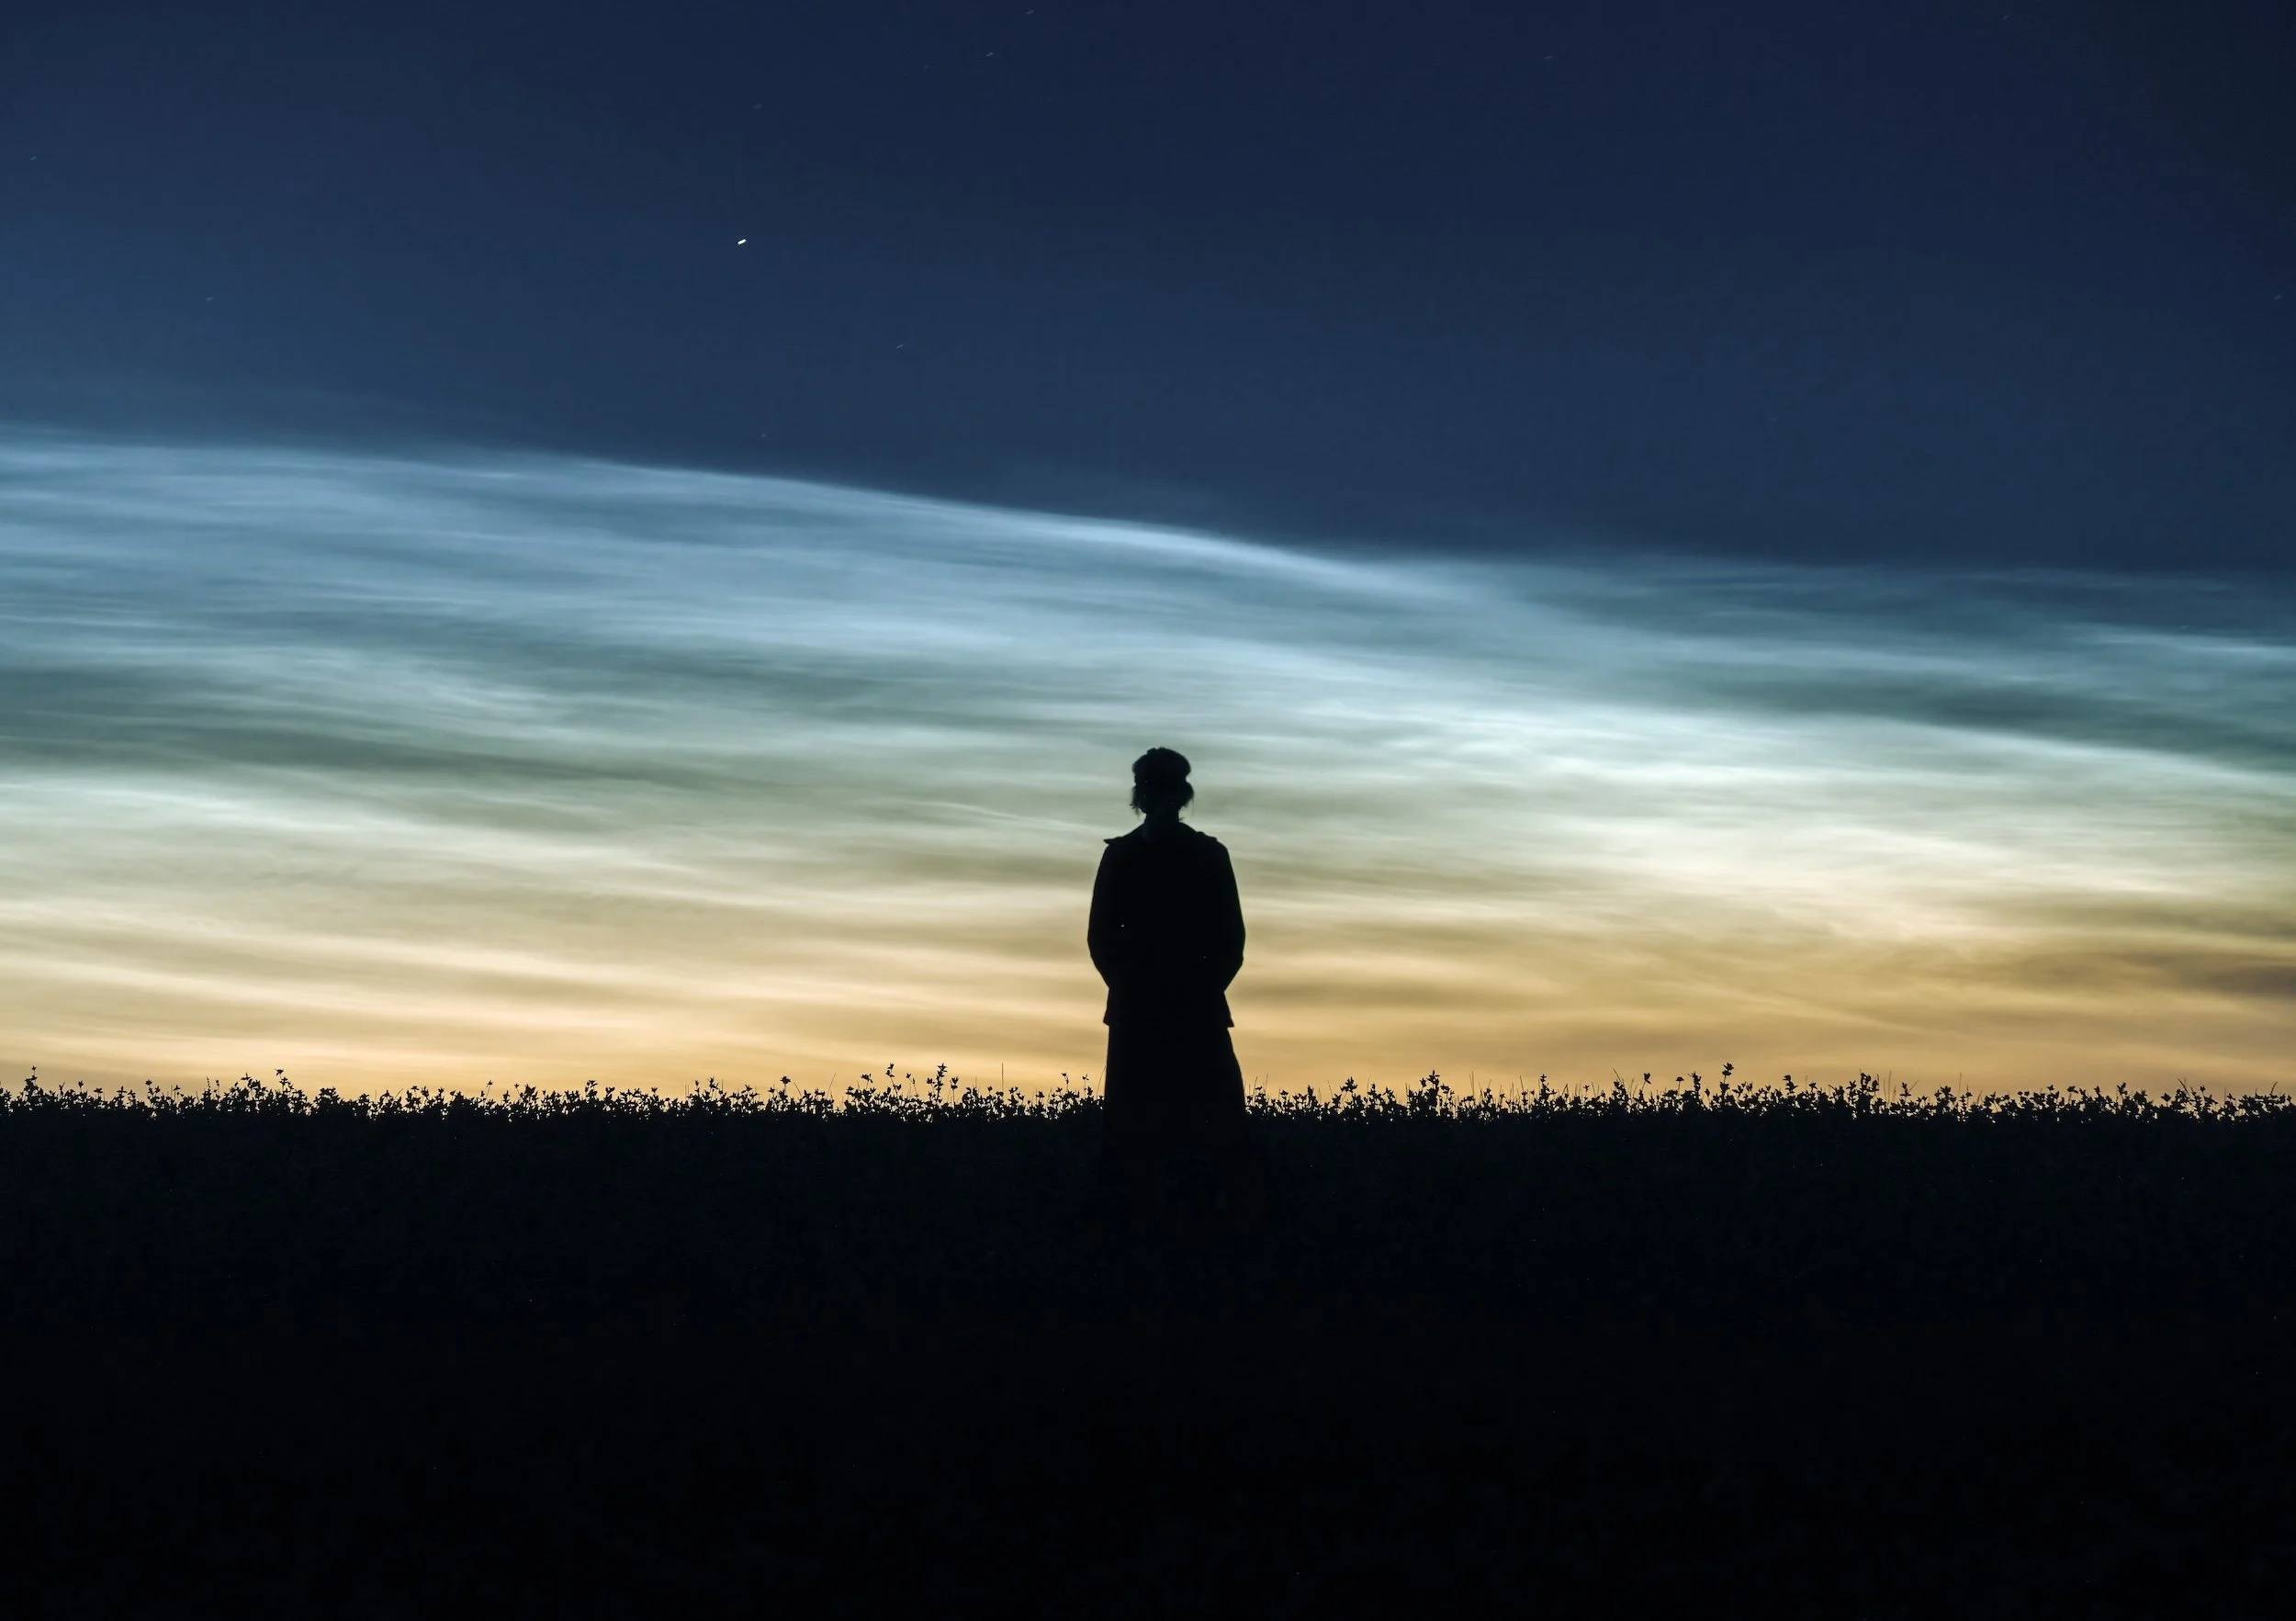
Noctilucent nights
This summer night started out as a dud. I went out on a promising forecast for noctilucent clouds only to be met with barely a blip of a display. After hours of waiting in the middle of the night, suddenly NLCs started to appear and grew into a stunning display that lasted well into the morning hours. It was well worth sticking around!
Conclusion
I hope these tips will help you on our photography outings and remember that a lot of these things come with time and experience as well.
You can practice them one at a time and slowly good habits will form and take over from our default ones.
Any questions? Happy to help in the comments section below!